Are you a pie person or a cake person? If you said neither, I hope it’s because you’re an ice cream person. For me, it’s been pie for as long as I can remember. To this day, I haven’t met someone who can bake better pies than my Grandma. She taught me how to bake my first pie when I was around 10 years old and having the exact recipes to recreate them in my home now is priceless. Have they ruined convenient store bought and even most restaurant and bakery pies for me? Yes. Am I okay with it? Yes I am! Is that statement also a little dramatic? Ruined? haha Yes, as well. Let’s keep going though 🙂

I promise you’ll understand if you try these pie recipes; I’m starting with Rhubarb, but I plan to add black raspberry, peach and apple to the blog in the near future. One great option is making the pies and freezing them unbaked to save for when you’re ready to bake and share them! This is especially helpful in the couple months leading up to the holidays. Freezing the pie crust itself is a time saver too. The pie crust recipe included below makes enough for two double crusted pies so you can cut the ball of dough into four sections, flatten each section a bit and freeze! The pie crust plays a significant role in making these desserts so darn good and this is all you do to make it…

The original recipe will tell you to start by mixing Crisco, flour and salt. Just like Dad’s Chocolate Chip cookies I decided to swap the crisco for coconut oil here; it worked brilliantly and we can all feel a little better about indulging in dessert 🙂 Once those ingredients are mixed, you make a hole in the center and pour in the beaten egg, apple cider vinegar (helps with consistency and makes the dough easier to roll out) and cold water (the cold water helps keep the crust flaky, Mmm). Stir that all together well and you have yourself some pie dough!

Now you just have to roll it out on a floured surface and flip as needed to prevent sticking. As you can see, it doesn’t need to be a rolled out perfectly in a circle, just big enough to fit over your pie pan. You’ll clean it up later after you fill it with the good stuff and add the second layer of crust.
The filling is just rhubarb, flour and sugar all mixed together! I’d recommend mixing the flour and sugar together separately and then pouring that over the fruit and stirring to combine. And since I’m posting a rhubarb recipe is September, when you likely won’t find it in stores any longer around here (Ohio) anyway, I’m also providing the filling recipe for peach and cherry pie in the recipe notes below! Another tip, when rhubarb is in season in the spring, chop it up and freeze some for later! You can even freeze the exact amount required for a filling in each bag and continue to make your homemade pie baking life even easier 🙂

Once you have the filling poured in your pie pan and the top layer of crust added, you’ll want to go around the outside and cut off all excess crust, where pieces are long and hanging over the dish too much, to make it even. Kitchen scissors work great for this or even a basic butter knife. Once that is done, I like to pinch the crust together and use a fork to press down every other indent. You’ll want the crust pressed together to help prevent the filling from running over, which will still happen on occasion! For my fellow visuals – here’s a great, short video on how to roll out and transfer pie crust! I’ll be honest, her method for transferring crust is great but you can also take a minor short cut like me and just fold your pie crust in half, place it on the pan and unfold. I’ll do some more prep photos in the next post!
My grandma always uses extra dough to roll out a few cut out stars to place on top of her pies and my brother specifically is known for snatching these up as soon as he walks in her kitchen on holidays! I decided to go with little flowers to decorate mine! And always use a fork to add a few layers of holes in the top of the pie crust so the steam can escape and your crust doesn’t puff up in the oven while baking! #beenthere

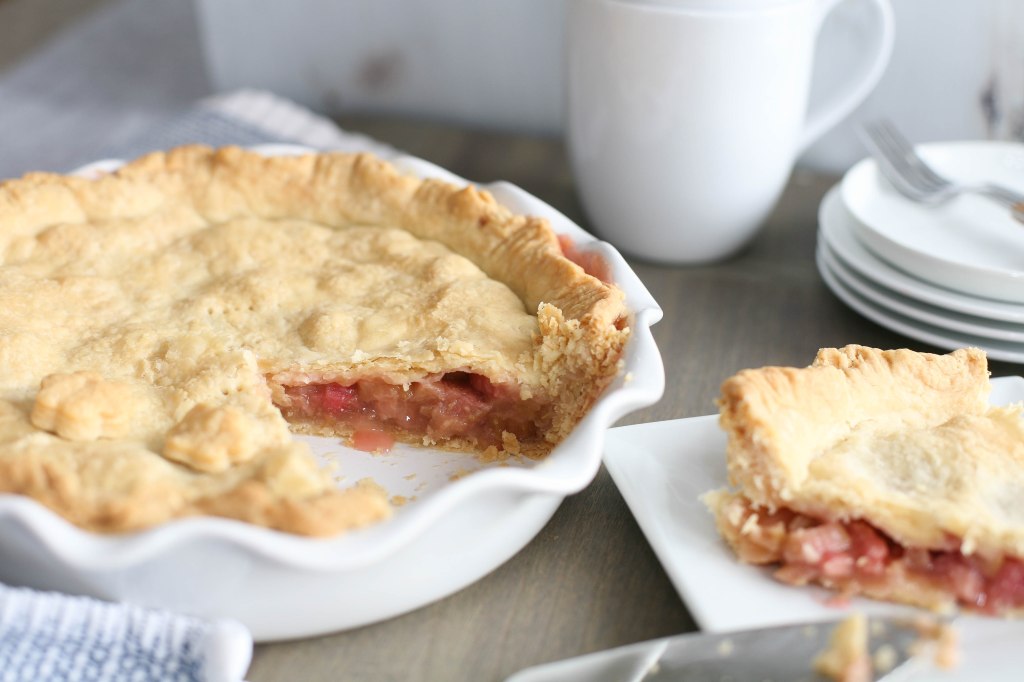
Then you bake the pie in the oven for about an hour at 350! We don’t like to wait this long to eat our pie after it comes out of the oven, but we do let it sit for usually at least two hours before slicing. This helps the filling cool down and set properly so it’s not overly runny. Apple pie is the exception, it’s just so good warm that it’s worth cutting into within an hour of coming out of the oven!
A couple extra baking tips to help with clean up….
- Place a piece of foil on the bottom rack of your oven below the pie to catch any filling that may run over
- Purchase a non-stick oven liner that also sits on the bottom rack of your oven to catch messes from anything baking; once the oven has completely cooled, you can take this out to rinse off, dry and put back in the oven. (reusable, eco-friendly!)
*For both scenarios, make sure to always place the foil or liner on the bottom rack, not the floor of the oven! The floor gets much, much hotter!
And that’s it! Homemade pies are very easy to make, you just have to be willing to set aside the time. The best approach is to make ahead of time and freeze or make and bake first thing in the morning and you’ll feel super accomplished and still have the whole day for other plans and delicious dessert to serve and impress at dinner 😉
My step-daughter won’t give rhubarb a chance right now (I have to admit, I didn’t start eating it until I was in my late 20’s) so my husband and I collectively ate this entire pie on our own over three to four days. We’re not sorry about it either. It was dessert some days and breakfast others haha

Happy Baking!
Rhubarb Pie

The perfect dessert to satisfy your sweet yet tart taste buds!
- 1 1/3 cups coconut oil (or crisco)
- 3 cups unbleached flour
- 1 tsp salt
- 1 egg (beaten)
- 1 Tbsp apple cider vinegar
- 6 Tbsp cold filtered water
- 4 cups rhubarb (chopped)
- 3 Tbsp Flour
- 1 generous cup sugar
-
To make the pie crust:
-
In a large mixing bowl, add coconut oil, flour and salt. Stir together until well combined. Then make a hole in the center and add the beaten egg, apple cider vinegar and cold water.
-
Stir all ingredients together to form a dough of evenly distributed ingredients. Use your hands as needed to press dough together and make one large ball. Divide into two to four sections depending on the size of your pie pans.
-
On a floured surface, use a rolling pan to roll out the bottom pie crust to desired thickness. Fold over and place on pie pan, half way in, and unfold to cover the whole pan. Roll out second section of pie crust and set aside while you make the filling.
-
To make the filling:
-
In a small bowl, mix together the flour and sugar. Add the chopped rhubarb to a medium sized mixing bowl and pour the flour and sugar mixture over top. Stir to combine well and pour into the pie pan over the bottom layer of crust. Use a spatula to spread evenly if needed.
-
Fold the top layer of pie crust, lay half way in the pan and unfold to cover the full pan. Clean up the edges of your pie crust as needed to make both layers even. Pinch the dough together around the entire pie and press every other indent using a wet fork (just rinsed with water). Using that same fork, poke three to four rows of holes in the center of the pie where steam can escape while baking.
-
Bake uncovered at 350 degrees for one hour. Keep an eye on the pie towards the end and watch for the crust to brown and the filling to bubble/boil. Remove from oven and allow to cool for 1-2 hours before slicing.
-
Store leftovers in the fridge for up to 4 days. Enjoy!!
Peach Pie Filling:
3 generous cups sliced peaches
1 cup sugar
2 Tbsp flour
Cherry Pie Filling:
3 generous cups cherries
1 cup sugar, maybe a bit extra with tart cherries
4 Tbsp flour

Leave a comment