Stuffed Cabbage rolls

Jump to Recipe

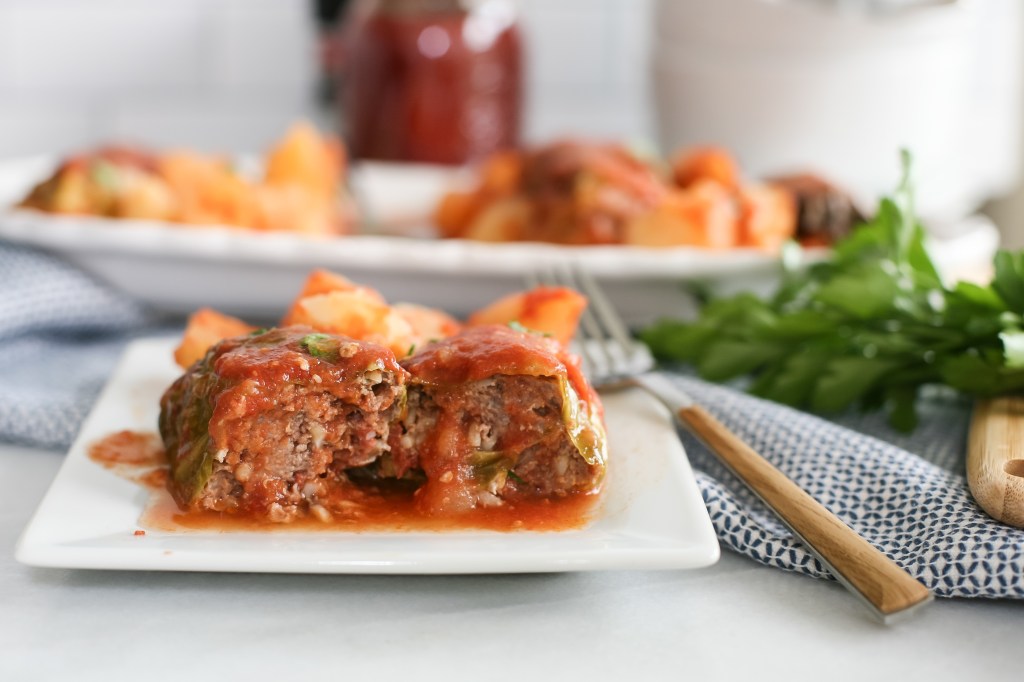
First things first, for the people who are here for the recipe only…click on that ‘Jump to Recipe’ link above & enjoy. I see you 🙂 But at the same time, how nice and cozy does this sound?

It’s a chilly, gloomy fall day. You’re in your comfy clothes, watching a movie on the couch and sipping a hot cup of apple cider slightly spiced with a cinnamon stick. And there’s no need to light that pumpkin candle on your coffee table just yet, because right now you have the best aroma filling your home from the stuffed cabbage rolls baking in the oven for dinner. The scene can be modified of course…maybe you’re actually reading a book or the newspaper. Or possibly coding or blogging on your laptop 🙂 And maybe the apple cider isn’t cutting it that day and you’re enjoying a latte or hot toddy instead. Two things are certain though…the smell of that tomato juice cooking with the cabbage rolls is amazing and pairing the stuffed cabbage rolls with smashed potatoes makes the coziest fall meal.

These are also perfect for meal prepping, because they freeze exceptionally well. I know this because my grandma is known for spoiling her grandchildren with random deliveries of frozen lasagne rolls or cabbage rolls. You can even bake them without thawing first so it can make weeknight dinners really easy if you just have the time to bake! To add to the spoiling, we pour home-canned tomato juice over our cabbage rolls and that just really takes this meal from good to great. So let’s get to the details…

Quick glance at the ingredient list to start with step by step instructions to follow…

Cabbage – which you can still find locally grown at the farmer’s market for a short while even if you live in a state where it’s getting colder since this vegetable tolerates those cooler temperatures well! You can also use bell peppers with this recipe to make stuffed peppers instead of stuffed cabbage rolls.

Ground Beef – We always look for lean, organic and grass-fed. Remember too that with this recipe you won’t be draining the grease after cooking the ground beef so that’s another reason to go with a lean version here.

Tomato Sauce – The recipe calls for one (14 or 15 oz) can and to be honest it’s a bit more than you need, but if you don’t use quite the whole can and have a couple tablespoons of tomato sauce leftover I have no idea what you’re going to do with it! So just go with it, it adds such good flavor and your meat filling will not be dry!!

Quick Cook Rice – You can use whatever rice you like best here. We always use brown rice or a brown rice and quinoa mix. I usually buy the ‘Seeds of Change’ brand.

Onion – Have you ever looked up ‘onion jokes’ because you didn’t know what to say about onions in an ingredient list? You can truly find anything on Google. Except a really good onion joke. Maybe my standards are too high haha

Worcestershire Sauce – Can anyone says this properly five times fast? One time? Regardless, this is another ingredient that adds such good flavor! I tend to do a generous portion of whatever amount the recipe lists!

Eggs – For binding everything together in your meat mixture, of course. Our favorite ones are still vital farms if we don’t have any fresh eggs from my brother-in-law 😉

Salt & Pepper – As almost always 🙂

Potatoes – Highly recommend adding potatoes to complete the meal. We just cube them and throw them in the roasting pan with the cabbage rolls and then smash them like a baked potato when plating, top with a little butter, freshly cracked pepper and a drizzle of tomato juice….y.u.m.

Tomato Juice – Speaking of 🙂 The icing on the cake in this scenario since ours is home canned by Grandma. I don’t have a great store recommendation, but I can tell you that canning tomato juice is a bit easier than you might think. Check out my ‘How to Can Tomato Juice’ post if you’re interested!

Step One:

Peel large leaves off a head of cabbage that can be used to roll up with the stuffing inside. Rinse well and blanch in boiling water to make rolling them up easier. Meaning they just need to be in the boiling water for a couple minutes to make the leaves more flexible, but not really cook the cabbage. Set aside while you make the meat mixture.

Step Two:

In a large bowl, mix together the ground beef, tomato sauce, rice, onion, Worcestershire sauce, beaten eggs, salt and pepper. Once well mixed, spoon the meat mixture onto each cabbage leaf. I wear disposable cooking gloves for this part and form each one into a mini meatloaf kind of shape to make them easy to rollup, if that makes sense! Next, roll up each meat filled cabbage leaf and add to a roasting pan. You can use toothpicks to keep the cabbage roll together if needed.

Step Three:

At this point, I like to peel a couple potatoes and dice them up to add to the cabbage rolls in the roasting pan. They really help to complete the meal. Plus, do you love one pan dinners? Me too.

Step Four:

Saving the best for last. Pour that tomato juice over the cabbage rolls and potatoes in the roasting pan, cover with the lid and place it in the oven to bake for an hour or so. I love meals that bake in the oven or cook in the crockpot, because then I can get other things done while dinner is being made and I feel so much more productive. Last time I made these I cleaned up the kitchen and worked out while they were cooking. And then I was rewarded with a delicious dinner. The little things haha

Full recipe details below. Stay cozy and enjoy, y’all 🙂

Stuffed Cabbage Rolls

Prep Time 20 minutes
Cook Time 1 hour 15 minutes
Servings 4

Ingredients

  • 1 head green cabbage
  • 1 lb lean ground beef
  • 1 15 oz can tomato sauce
  • 1/2 cup quick cook rice uncooked
  • 2 Tbsp chopped onions
  • 1 tsp Worcestershire sauce
  • 1 tsp salt
  • 1/2 tsp pepper
  • 2 eggs beaten
  • 2 – 3 large potatoes peeled and cubed
  • 1 quart tomato juice

Instructions

  1. Preheat the oven to 350 degrees Fahrenheit.

  2. Peel off enough cabbage leaves from the head of cabbage to make five or six cabbage rolls. Blanch the cabbage leaves in boiling water for two to three minutes. Remove from the water, pat dry and set aside.

  3. In a large bowl, mix together the beef, tomato sauce, rice, onion, Worcestershire sauce, salt, pepper and eggs. Once combined, add spoonfuls to each cabbage roll. Roll up each one and insert a toothpick as needed to help the cabbage roll stay together.

  4. Place the cabbage rolls in a large roasting pan. Peel and cut russet potatoes, if using, and add the cubed potatoes to the roasting pan on and around the cabbage rolls.

  5. Pour tomato juice over the cabbage rolls and potatoes. Add the lid to the roasting pan and place in the oven. Bake for one hour. Be sure meat is fully cooked and cabbage is soft enough to be easily cut with a fork. Enjoy!

Have a beautiful day!


Dad’s Homemade Buffalo Wing Sauce

Jump to Recipe

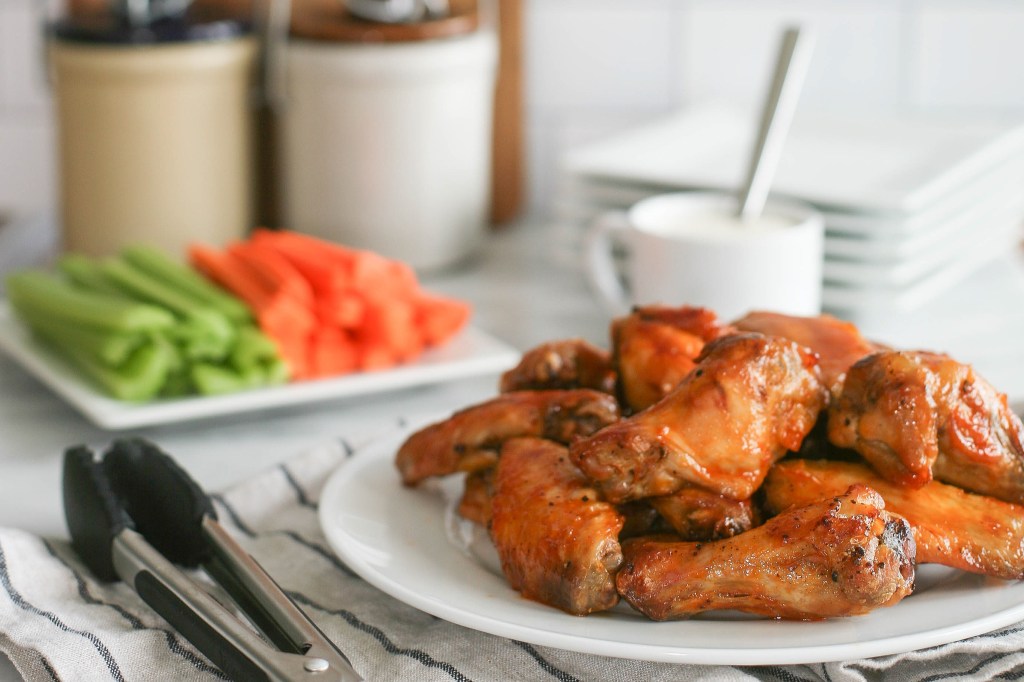
Did you grow up with a traditional pizza night every week? What about a wing night? Or maybe you combined the two. Brilliant.

I definitely grew up on one favorite pizza shop (Penso’s, family owned in my home town and still our favorite to this day), but we hopped around when it came to visiting restaurants for wing night. And for some reason I remember that often being Thursdays. But while we found plenty of great spots to grab wings at a good price over the years, I’ll likely choose these baked wings tossed in homemade sauce any day….that I feel like cooking 🙂 And honestly, you don’t even have to feel that motivated to make these; the effort is minimal and the sauce takes a true five minutes to make on the stove.

You’ll want to get the wings going first and make the sauce while the chicken is broiling. If you can find split wings at the grocery store, that’ll make your life easier from the start. If you can only find whole wings, you can also split them at home using a sharp knife…which I rarely attempt and in those cases just bake them as is letting down real chefs in kitchens all around the world haha

Pat the chicken wings dry as needed and place them on a foil covered baking pan. Sprinkle with black pepper, place in oven and broil on high for fifteen minutes. At fifteen minutes, turn the broiler off, flip the wings and then broil for another fifteen minutes. If a good bit of grease is already laying on the foil, feel free to move the wings to a new foil covered pan as you flip and before you broil them a second time.

While the wings are broiling, add all six sauce ingredients to a small saucepan over medium heat and stir together as the butter melts and everything mixes together. Reduce heat and allow the sauce to cook down slightly so it gets a little thicker. That’s literally it. The recipe calls for half a stick of butter (four tablespoons). I tend to keep with this amount, but you can go up to five tablespoons if you’d like (Dad does) and that helps with the sauce sticking to the wings a bit better. Set aside a small cup of sauce to use for later; you’ll toss the wings directly in the saucepan.

Back to the oven…turn the broiler off and remove the wings from the oven. Preheat the oven to 350 degrees. Use tongs to blot each wing on a paper towel, toss in sauce and place on a new foil covered baking pan. Once all wings have been tossed in sauce and transferred to the new baking pan, place back in oven and bake for 15 minutes or until fully cooked. Remove from oven and brush on extra sauce as desired using the sauce you reserved in a small cup earlier.

That’s all it takes for the wings! We typically like to serve them with pretty traditional sides…fries (we love the rosemary with sea salt fries by Alexa) and of course we serve carrots and celery with ranch or blue cheese dressing. Here’s the great part though. This sauce works perfectly well with shredded chicken and I suspect just as well with cauliflower too in case wings are just not your thing. I haven’t tried it with cauliflower yet, but the shredded chicken is super simple. Just slow cook chicken breasts or chicken thighs in the crockpot or oven in a little bit of broth. When the chicken is done, remove it from the crockpot or roasting pan and discard the broth & juices. Shred the chicken, add back to the crockpot or roasting pan, pour sauce over top and toss to mix. Let that sit for a little bit to marinade and then serve as sandwiches, wraps or in salads. I go for the salad option more often than not. so good!

Check out the full recipe below and let me know how you choose to use the sauce! And if you photograph your delicious creation and share on Instagram, tag me! I’d love to see! @pinch.of.parsley 🙂

Print Recipe

Dad’s Homemade Wing Sauce

The perfect sauce to toss your wings, shredded chicken or cauliflower in for dinner!

Prep Time 5 minutes
Cook Time 5 minutes

Ingredients

  • 4 – 5 Tbsp butter* sliced
  • 1/2 cup Frank's Original Hot Sauce
  • 1 Tbsp apple cider vinegar
  • 1 Tbsp Worcestershire Sauce
  • 1 Tbsp Lemon Juice freshly squeezed
  • 2 Tbsp Honey

Instructions

  1. Add all ingredients to a small saucepan over medium heat. Stir frequently as butter melts and all ingredients mix together.

  2. Reduce heat and allow the sauce to cook down slightly so it gets thicker.

  3. Remove from heat. If not quite ready to use, be sure to stir again before tossing wings or cauliflower or before pouring over shredded meat. Enjoy!

Recipe Notes

*You can use 4 or 5 tablespoons of butter depending on preference. As noted within the post, using 5 tablespoons will help the sauce stick to wings a bit better!

Have a beautiful day!


Chicken, Avocado & Pear Salad with Homemade Honey Mustard Dressing

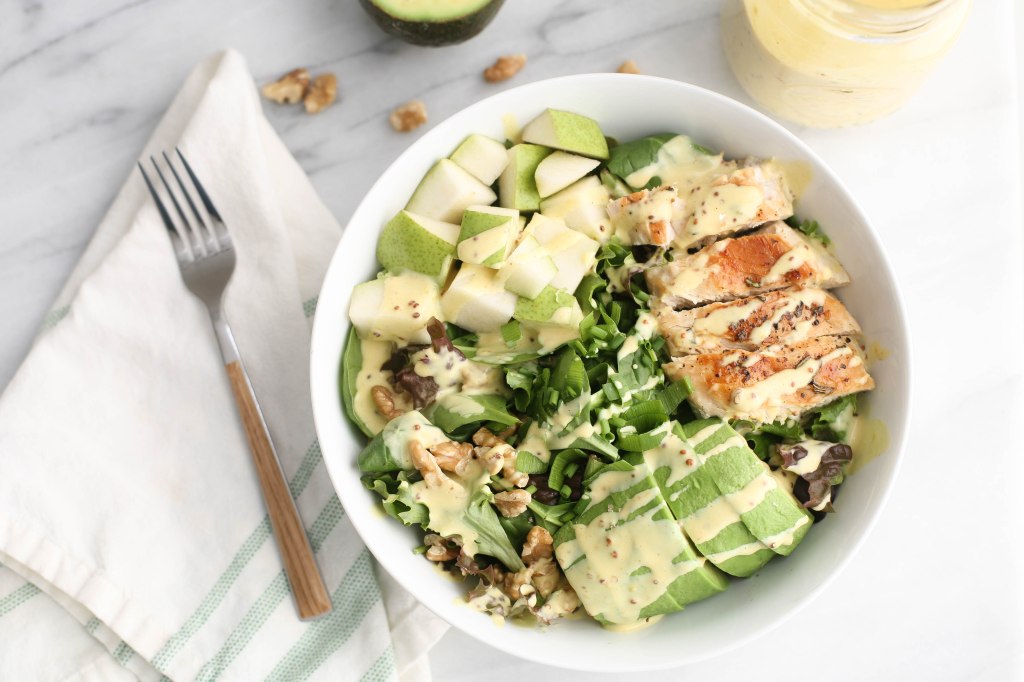
The title of this post is a little long. I could have just titled it Homemade Honey Mustard Dressing, because that’s really the star of the show here. But then there’s this salad that turned out to be the perfect combination of ingredients to pair with the dressing and I couldn’t just choose one or two ingredients to highlight. At the same time, I didn’t want to get completely carried away…Chicken, Avocado, Pear, Walnut and Read More


Caribbean Style Chicken

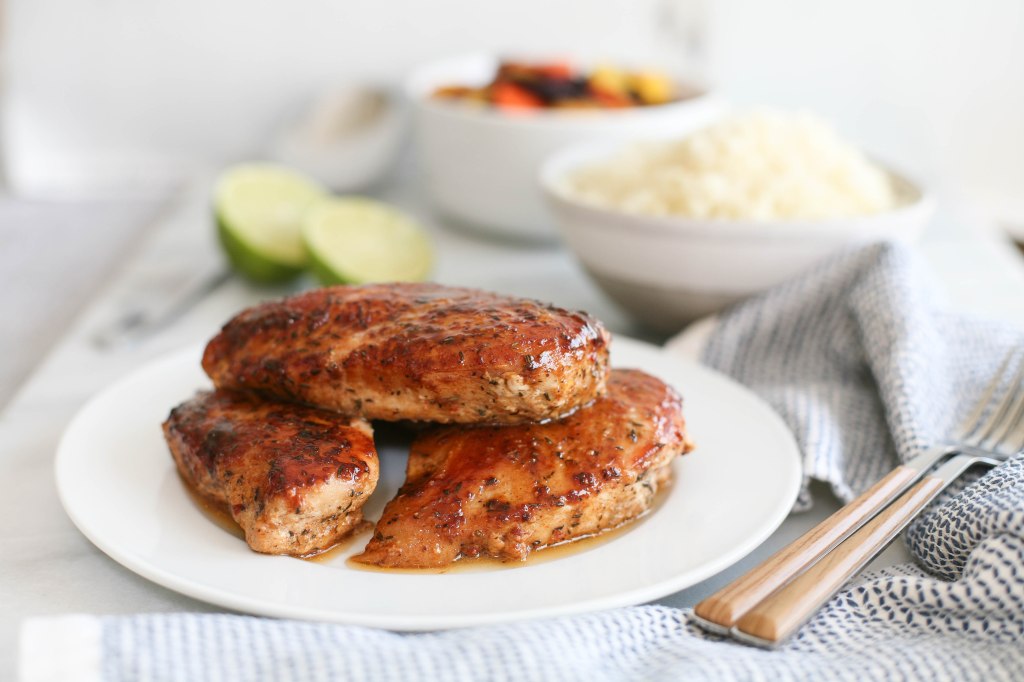
This recipe is from my newlywed days and a direct result of our honeymoon in Jamaica. We stayed at a Secrets resort right in Montego Bay where a chef grilled the best Jamaican jerk chicken by the pool every afternoon. We know, because we stood in line for that chicken every day and when the line was long and the sun was hot it was still worth the wait! A couple quick things about that honeymoon and the Secrets resort in particular…

  • We stayed here specifically and it’s been six years since we’ve been there so there’s certainly plenty that may have changed over time, but we loved it!
  • The food we had while we were there was great and the drinks were good quality. Also, rum & coca cola tastes so much better in Jamaica.
  • It was very easy to schedule excursions and we loved the snorkeling one we did that also stopped at the original Margaritaville before heading back to the resort
  • But please do not do the free snorkeling at the resort! Just don’t. When we attempted this at least, the equipment was low quality, supervision poor and overall experience bad. As in, let’s just talk about chicken instead… haha

IMG_8173

So when we got back from our honeymoon I started browsing Pinterest for a jerk chicken recipe (after wallowing for a bit that we didn’t purchase the seasoning to bring home with us) and to be honest I got a little intimidated by the long list of ingredients in all the recipes I was finding! I’ve since learned a long ingredient list doesn’t necessarily equal a high level of difficulty! But then I came across this one and I don’t feel right calling is jerk chicken so I just reference it as Caribbean inspired chicken! The only thing I’ve really changed is using Tamari sauce instead of Soy sauce, though both are good! Ingredient list looks like this…

  • Chicken – your choice, all cuts would work!
  • Olive Oil – always recommend buying top quality; such a difference in taste & health benefits
  • Brown Sugar – light or dark, depending on your flavor preference (dark brown sugar yields a little stronger flavor than light)
  • Tamari Sauce – or Soy Sauce 🙂
  • Italian Salad Dressing Mix – I like the ‘Good Seasons’ brand
  • Dried Thyme – actually a great source of vitamin C, who knew!
  • Ground Cinnamon – Adds a great dynamic
  • Cayenne Pepper – gives it just enough spice, for those with low tolerance. me 🙂

00100lPORTRAIT_00100_BURST20190811150224885_COVER

I like to mix all of the above ingredients in a small bowl and then pour the marinade over the chicken in a baking dish that can be tossed in the dishwasher afterwards. Easy clean up and no waste! At minimum, I’d suggest letting the chicken marinate for 30 minutes. This is usually the timing I follow if I decide to make this last minute on a weeknight. If you can though, as with all marinades, let the flavor soak in for a good few hours in the fridge. In that scenario, just cover the top with plastic wrap.

This marinade is also known as ‘the good sauce’ in our household. Hailey loves this chicken and when she sees me prepping it in the kitchen she asks ‘Is that the chicken with the good sauce?’ haha You bet.

00100lPORTRAIT_00100_BURST20190811162130301_COVER

When it comes to cooking this chicken, grilling or stove top will be your best options; I’ve baked this a time or two as well, but it wasn’t my favorite. When I made it for this blog post we didn’t have a grill so I went stove top and it was delicious! Don’t flip too soon, make sure the bottom of the chicken is nice and browned and starting to crisp up before you flip it over; this is true for any meat really and will yield the most flavor! Now that we have a grill again though, that’s our preferred method. There’s just something about food right off the grill that’s so darn good!

When we sold our last house we left the grill with it, because it wasn’t in great shape and we were headed to a tiny apartment while our new home got built. With next to no room at the apartment, we never purchased a new grill during that time and then when we moved into our house we had a laundry list of purchases to make so it took us a little while, but we finally checked a new grill off that list! We went with charcoal this time, but actually use charred wood mostly and as we’re learning we are loving the smoked/grilled flavor it gives our meats and veggies! Oh and since we don’t have a deck on the back of the house yet, we grill right outside our garage in the driveway. Sometimes Allen uses the tractor as place to sit while the food is cooking. Do I even need to mention we moved to the country? I think it sounds pretty obvious… haha

00100lPORTRAIT_00100_BURST20190811170257308_COVER

Lately, my favorite sides to serve with this chicken are riced cauliflower and tri-colored roasted carrots. I don’t know why this wouldn’t taste the same to me across the board, since it’s just cauliflower haha, but my favorite riced cauliflower is from Trader Joes! It’s the best one and they also have a riced cauliflower stir fry mix that’s pretty tasty too. I could also totally eat this with a baked potato and salad, rice and steamed broccoli or just a side of grilled vegetables! Basically, you can’t go wrong 🙂

Enjoy!!

Caribbean Inspired Chicken

Flavorful chicken with just a hint of spice

Prep Time 2 hours
Cook Time 20 minutes

Ingredients

  • 4 boneless, skinless chicken breasts
  • 1/4 cup olive oil
  • 2 Tbsp light brown sugar
  • 2 Tbsp tamari sauce or soy sauce
  • 1 envelope Italian salad dressing mix
  • 1 tsp dried thyme
  • 1 tsp ground cinnamon
  • 1/2 tsp cayenne pepper

Instructions

  1. Add all ingredients (minus the chicken) to a small bowl and stir well to mix.

  2. Place the chicken in a baking dish and pour the marinade over the chicken. Move chicken around and flip as needed to fully coat all pieces. Allow to marinate for at least 30 minutes or up to 4 hours. If marinating for 30 minutes, you can leave on the counter. If longer, cover with plastic wrap and keep refrigerated.

  3. Cook chicken as desired (on the grill or in a skillet on the stove top) Cook for 5-8 minutes on each side or until chicken reaches an internal temperature of 165 degrees fahrenheit. Serve immediately with your choice of sides!

Have a beautiful day!


Superfoods Soup

When I come across a new song I like I do this thing where I listen to it over and over. Anyone else? I learned Allen does the exact same thing on our second date when we had the simplest evening listening to music, creating a playlist together and sipping wine. We basically listen to these songs until we don’t like them anymore and then move on to the next one. It’s still true to this day. Lately I hear Read More


Taco Stuffed Peppers – Halloween Edition

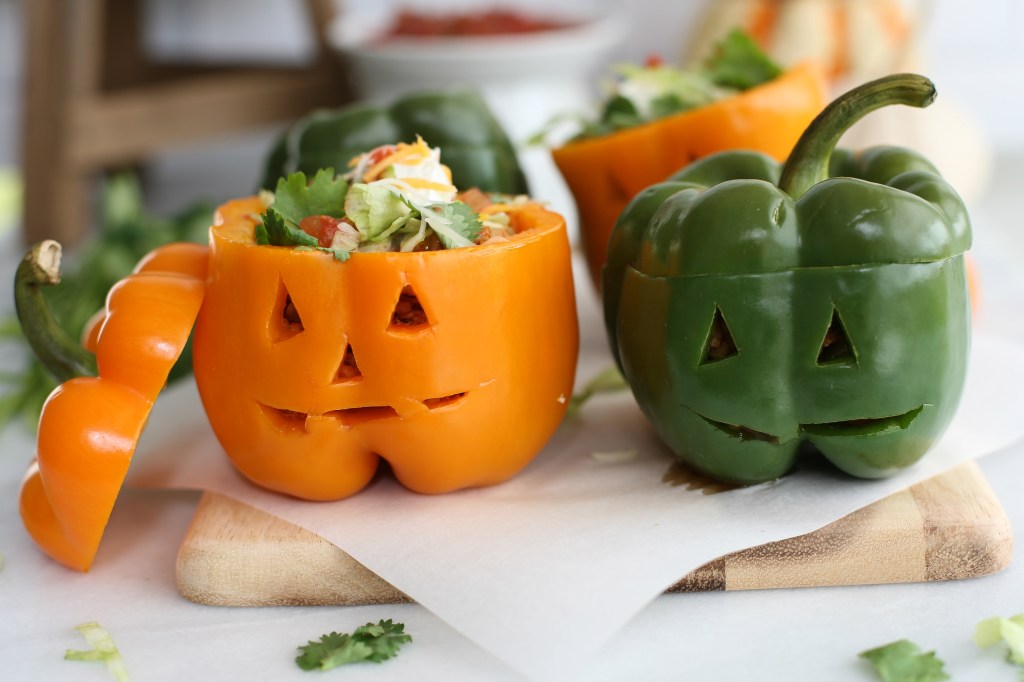
When I moved in with Allen over eight years ago, I quickly got in the habit of looking for recipes or ideas to make food fun. Hailey was, and is, a pretty picky eater so I wanted to get creative to help her branch out a little bit and and honestly I ended up really enjoying it too. I made colored pasta, smoothies with hidden veggies in cute glasses accessorized with Read More


Taco Stuffed Avocados

Here’s the thing, if you’re serving dinner for friends or family or friends who are family on taco Tuesday and you want your presentation to be on point then you should definitely make these taco stuffed avocados as pictured above. They’ll look great on the table with the rest of your delicious spread. If, however, you’re making dinner for Read More


Three Cheese Stuffed Shells

It’s been a busy few weeks, y’all! I’ll get you up to speed. Working, packing, moving, cleaning, picking up take out, repeat. Busy. That sweet place we’ve called home for the past eight years officially belongs to another family now. We backed out of our driveway for the last time on Wednesday, left our keys behind and completed the closing on Thursday. It’s such a weird feeling at first, like strangers are living in your house. I do hope they enjoy it as much as we did; that house was Read More


Korean Inspired Ground Beef

Alright y’all…remember that last post (super yummy brunch casserole) where I told you we put the ‘For Sale’ in our front yard? Well, we received an offer on our house the next day, accepted it the day after that and had the home inspection done three days later. We had a handful of showings for two days and I am so thankful we didn’t have to do more than that! Exclamation point! This is my first experience selling a home and Read More