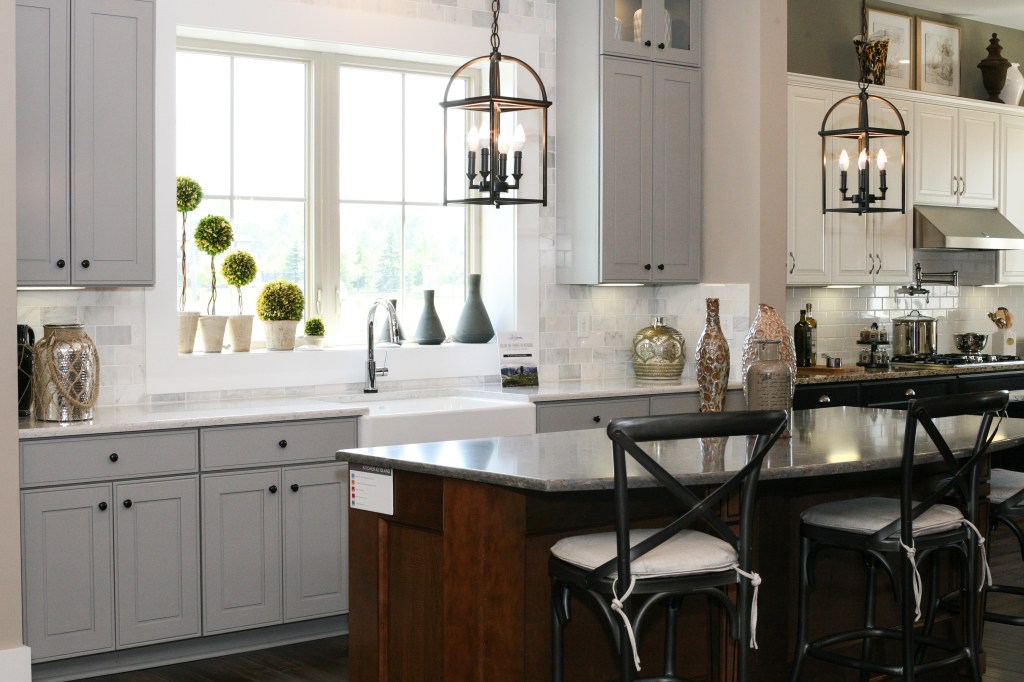
Design Studios are full of inspiration…and beautiful kitchens! Exhibit A in that featured photo above.
If you’ve been reading these new build posts in order, the next step in the process is to meet your design consultant and choose EVERYTHING for your home over the course of two hours, give or take thirty minutes. Don’t worry, what you put on paper during this meeting still isn’t “final final”.
Full disclosure, this meeting can get a bit overwhelming for anyone and people who are indecisive especially (hand raised!). So I’m going to give you a quick overview of how the meeting will go down and then toss around some helpful tips on how to prepare, what to think about while you’re there and what to jot down as homework after you leave. It’s very important to note I did not do all of these things. I’d love to tell you I was on my A+ game and rocked my own meeting, but it was in fact my first time at the rodeo 🙂

Quick overview of how this meeting is going down…
- Your design consultant will meet you in the lobby upon arrival.
- He/she will walk you through the studio to help you select choices for each category I mentioned in the New Home Consultation post. They have designated spaces for exterior, counter tops, backsplashes, cabinets, flooring and stairwells. And of course the sets of kitchens and bathrooms. Just keep in mind, much like the model homes, these kitchens and bathrooms are also highlighting upgraded options 🙂
- As you walk through each room and make selections, your design consultant will make notes on a printed copy of your house plan.
- Once everything is chosen, your design consultant will update the soft copy of your house plan with your selections and email you the updated version that will now have a more accurate final cost listed.


Before you go…
- Remember when you were at the studio with your new home consultant finalizing your initial plan and scheduling this appointment? If you have some time afterwards, walk through the design studio on your own and jot down a couple counter tops, backsplashes and flooring you fancy.
- Take those names and do some searches on Pinterest and Google Images to see how the samples look in a finished room. This will be really helpful (I did this after our design appointment), because sometimes it’s just hard to truly imagine how something will look when you’re staring at a 10×10 sample.
- Walk through the model homes near you again and make note of anything you like in them so you can ask about it and find the exact match. For example, I loved the countertop and cabinets in the half bath of the Olivia model on site and asked for that exact combination in our home. “I’ll take that bathroom please. Thanks” By some miracle, both were in the budget category we previously selected in our new home consultation meeting!
- If you have an interior designer or a friend who should be one, invite him/her to this meeting! I’m assuming this is the same with every studio – our consultant was not an interior designer. She certainly helped us with choices and has seen plenty of great combinations from other clients, but always encouraged us to go with what we like versus weighing in more on the decision.
During your meeting…appointment…same thing?
- Take photos of everything you select! Our sweet consultant was so kind to go back around and help me gather our selections at the end when she mentioned this great idea! Be sure you can see the name and number in the photo and make some notes at home about what goes where. This is really nice to have when you receive your updated plan so you can read through it and validate everything is documented accurately.
- You’ll probably start with the exterior, which I think is the simplest (shortest) part so it’s good to knock that out and continue on with interior. We’re doing a light gray siding and dark gray shutters and front door. Unless you’re doing a really cool wood door, I recommend matching your door color with your shutters.
- When you move to interior selections, I found it helpful to choose our flooring and wall paint color first and build from that. Keep in mind what will compliment each other as you’re ‘shopping’.
- Take advantage of the space. We walked around with our samples and tried them out. We loved the kitchen backsplash in the model home on site so we carried samples of the counter top and cabinet we liked over there and put them up against the backsplash to get a better idea of how it would all look together. If you’re unsure on paint color, they can also give you paper samples to take home and think over!


*Quick note – Our base plan came with one flooring and one paint color throughout the entire home. But you can customize anything. Hailey wanted to choose her own floor for her bedroom so we added a fairly small cost to do a different floor in one room upstairs. Even though she wants to do some painting as well, we kept the one paint color throughout our home, because that’s such an easy change and I don’t think I’ll really know if I want to change a paint color in other rooms until we’re moved in and start decorating!
Hailey’s bedroom flooring 🙂

Oh! It’s also important to note the stairs are handled separately. We are doing the same wood floor on our stairs, but also including carpet centered on each step. I don’t need to be falling down the slippery stairs in the winter when I’m wearing my favorite thick and fuzzy cabin socks!

Homework after you leave…
- Read through your entire updated house plan! Be sure every selection you made is documented accurately and make notes on anything you want to revisit or maybe still need to finalize, because you were torn between a couple choices or unsure.
- After our design meeting, we changed our shutter and door colors, the cabinets and countertop in one of the bathrooms, the kitchen counter top and the tile in our master bathroom! Remember when I admitted to being indecisive 🙂
- Make a second trip to the design studio. You don’t necessarily need to schedule a second appointment, especially now that you know how everything works. You’re always welcome to walk through and browse on your own. This is exactly what we did and then simply emailed the changes we wanted to make to our consultant.
- Measure out selections at home. What do I mean? Let’s take the tubs and showers for example. These were recently installed at our house and are a bit smaller and more narrow than we expected. Yet, we signed off on the papers with those measurements back in March. I’d suggest looking at your selections and measuring and taping off that space at home to get a good visual of the size – if you’re more of a visual person like me. Sometimes standard is smaller than you’d think! I have a feeling we’ll do some bathroom upgrades in the next few years 🙂
- Schedule your Pre-Construction meeting. This meeting has some prerequisites so be sure you understand what needs done between now and then. (I’ll get into details in the next post focused on this meeting) Your design consultant will put you in touch with your next helper (customer coordinator) who will work with you on these steps to prepare for the last meeting before breaking ground!
And because I’m behind on these posts and we are well into construction with our home, here’s another sneak peak of my favorite spot! Drywall week is really exciting! Follow along on Instagram for more photos and frequent updates!

Have a beautiful day!!

Leave a comment